Renovation of My Measuring Rig for Headphones
I wrote a big article about my measuring rig more than two years ago. A lot of things have changed since then. Today I’ll tell you what the changes were like.
1. New rubber ears
As a reminder, the old rig had Shore A20 ears — and this was the wrong hardness. Those ears corresponded to the simplified T-REC P.57 standard and had measurement errors in the upper middle and high frequencies, in the range of 1.5-10 kHz. I used a correction curve that let me compensate for these errors to some extent, but not always and not to the full, which I honestly wrote about. Not so long ago, the manufacturer of this rig, namely the Chinese guys from Sounds Good Store, released correct versions of these ears, or copies of GRAS KB501X, which are actually and usually used to measure headphones along with GRAS43AG.
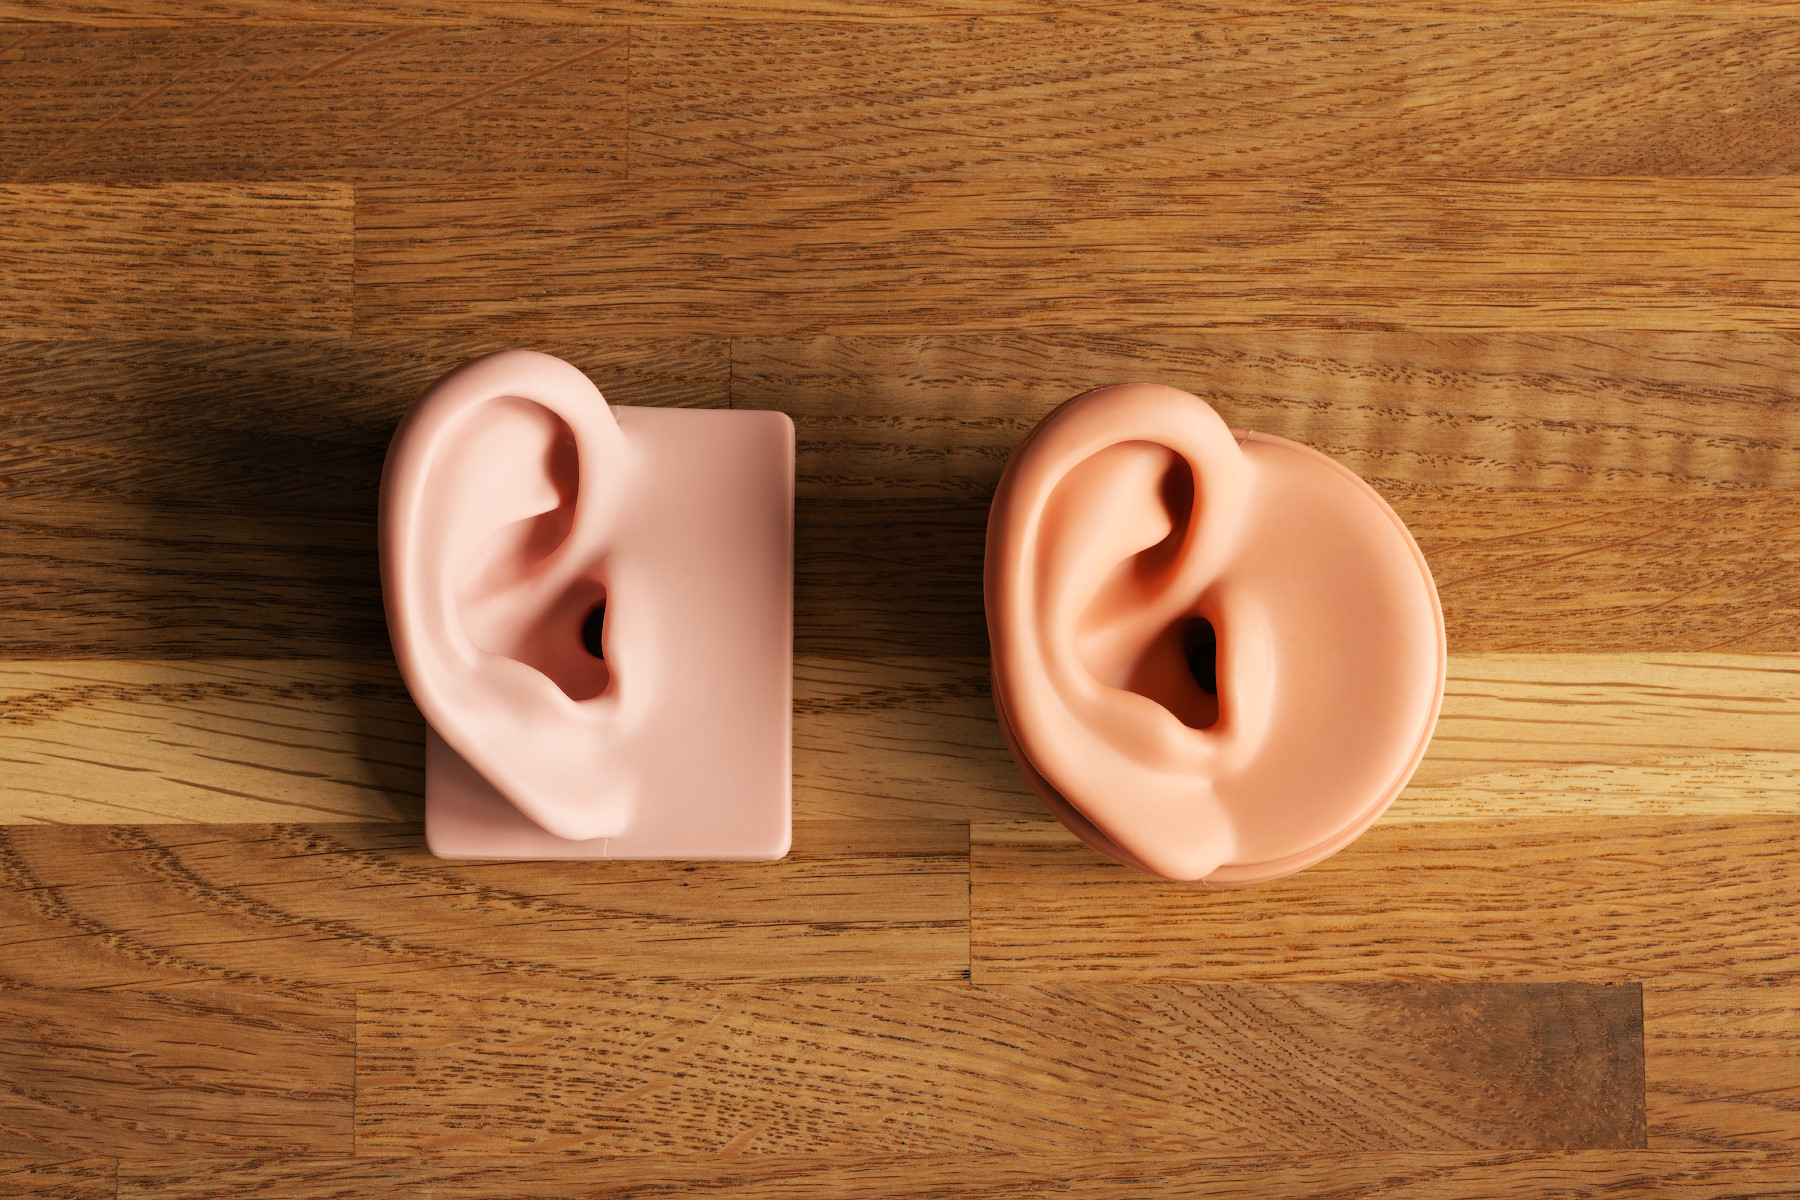
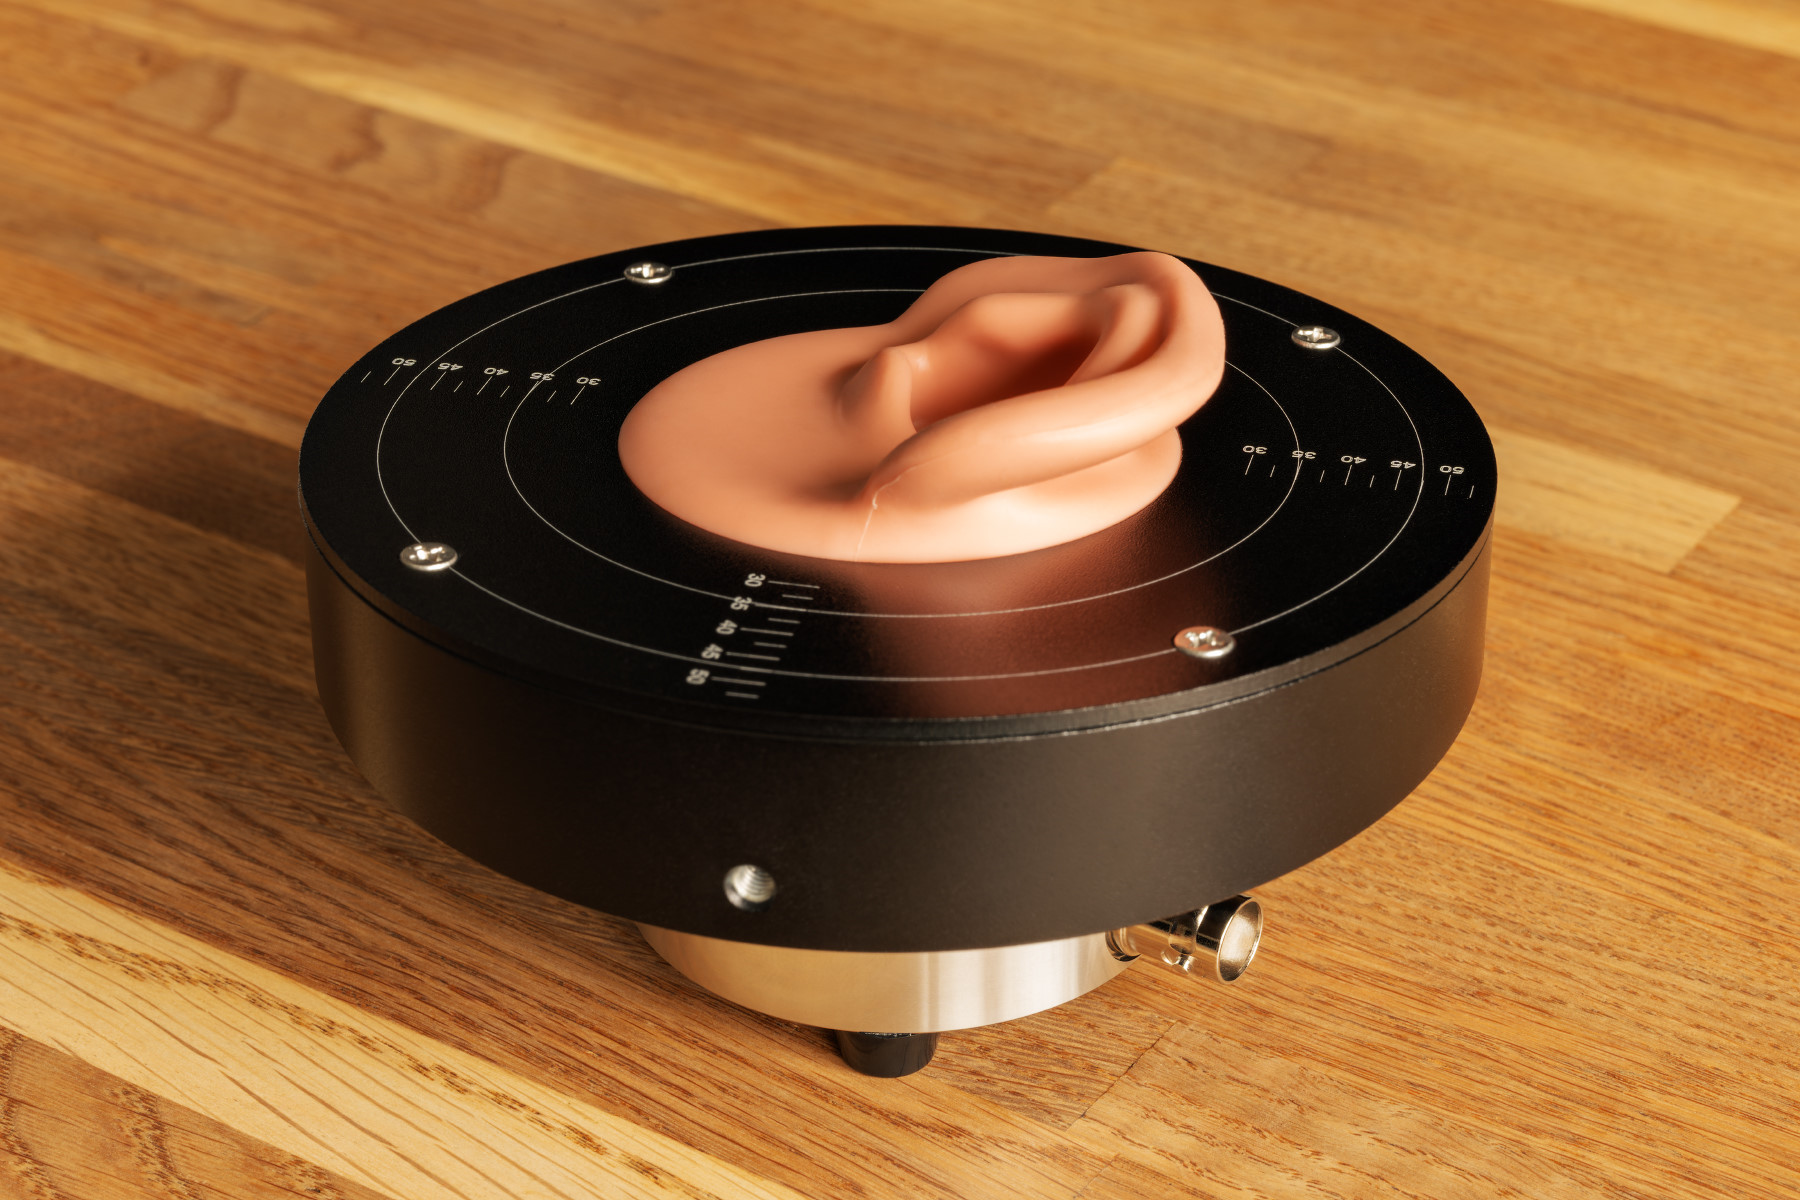
The new ears have the right hardness – something like Shore О35. They are very soft. They also have a more correct, complicated geometry of the auricle, a well-shaped auditory canal, and their design is just completely different.
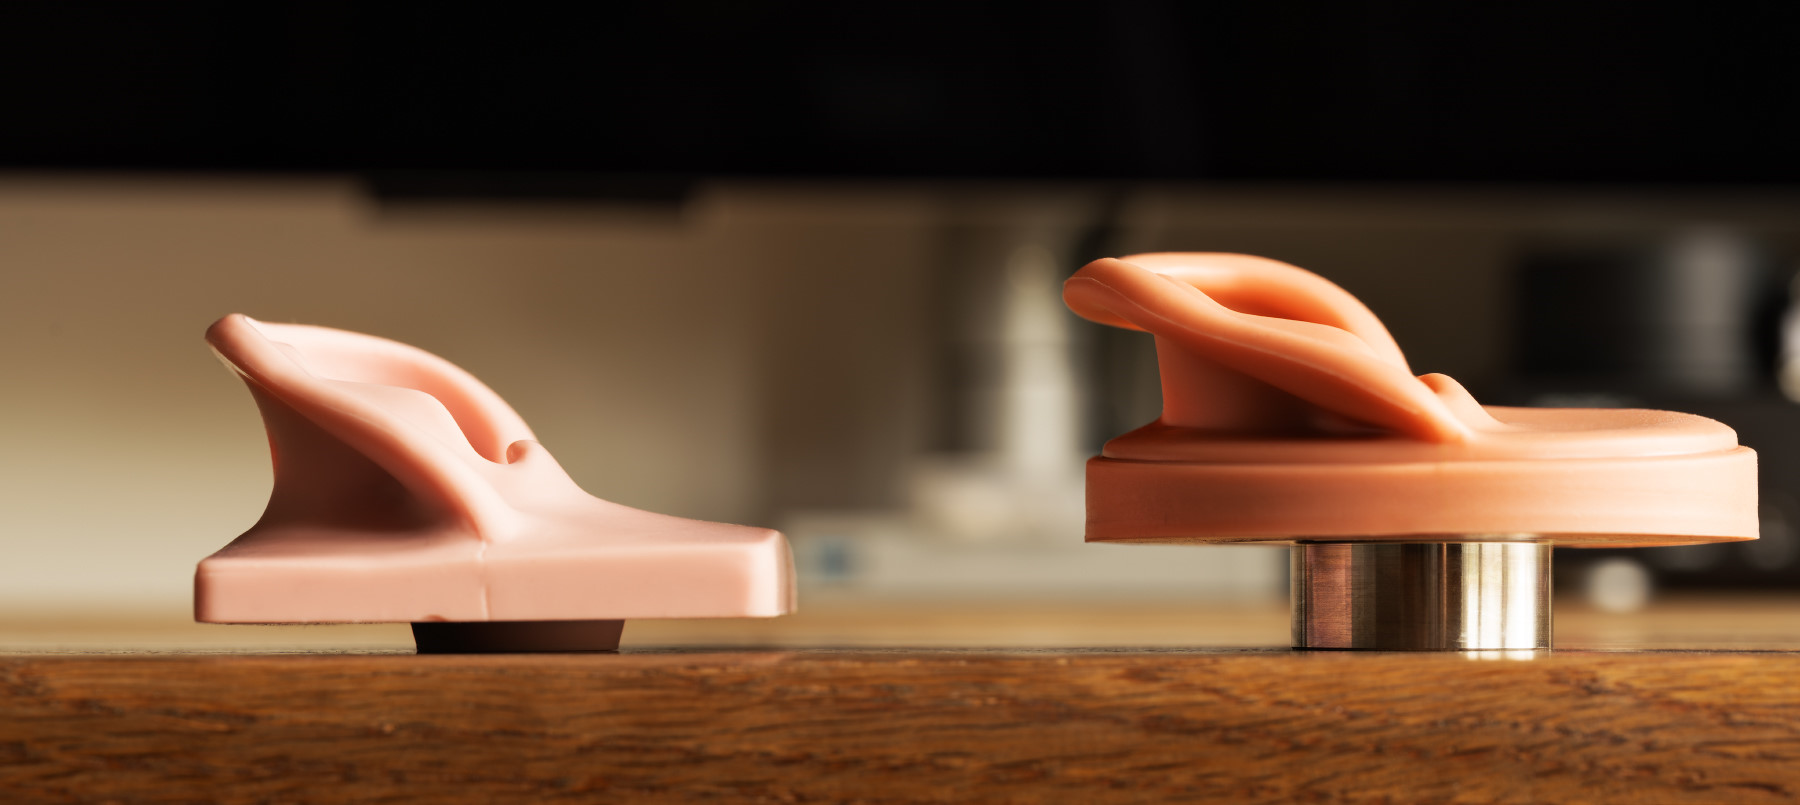
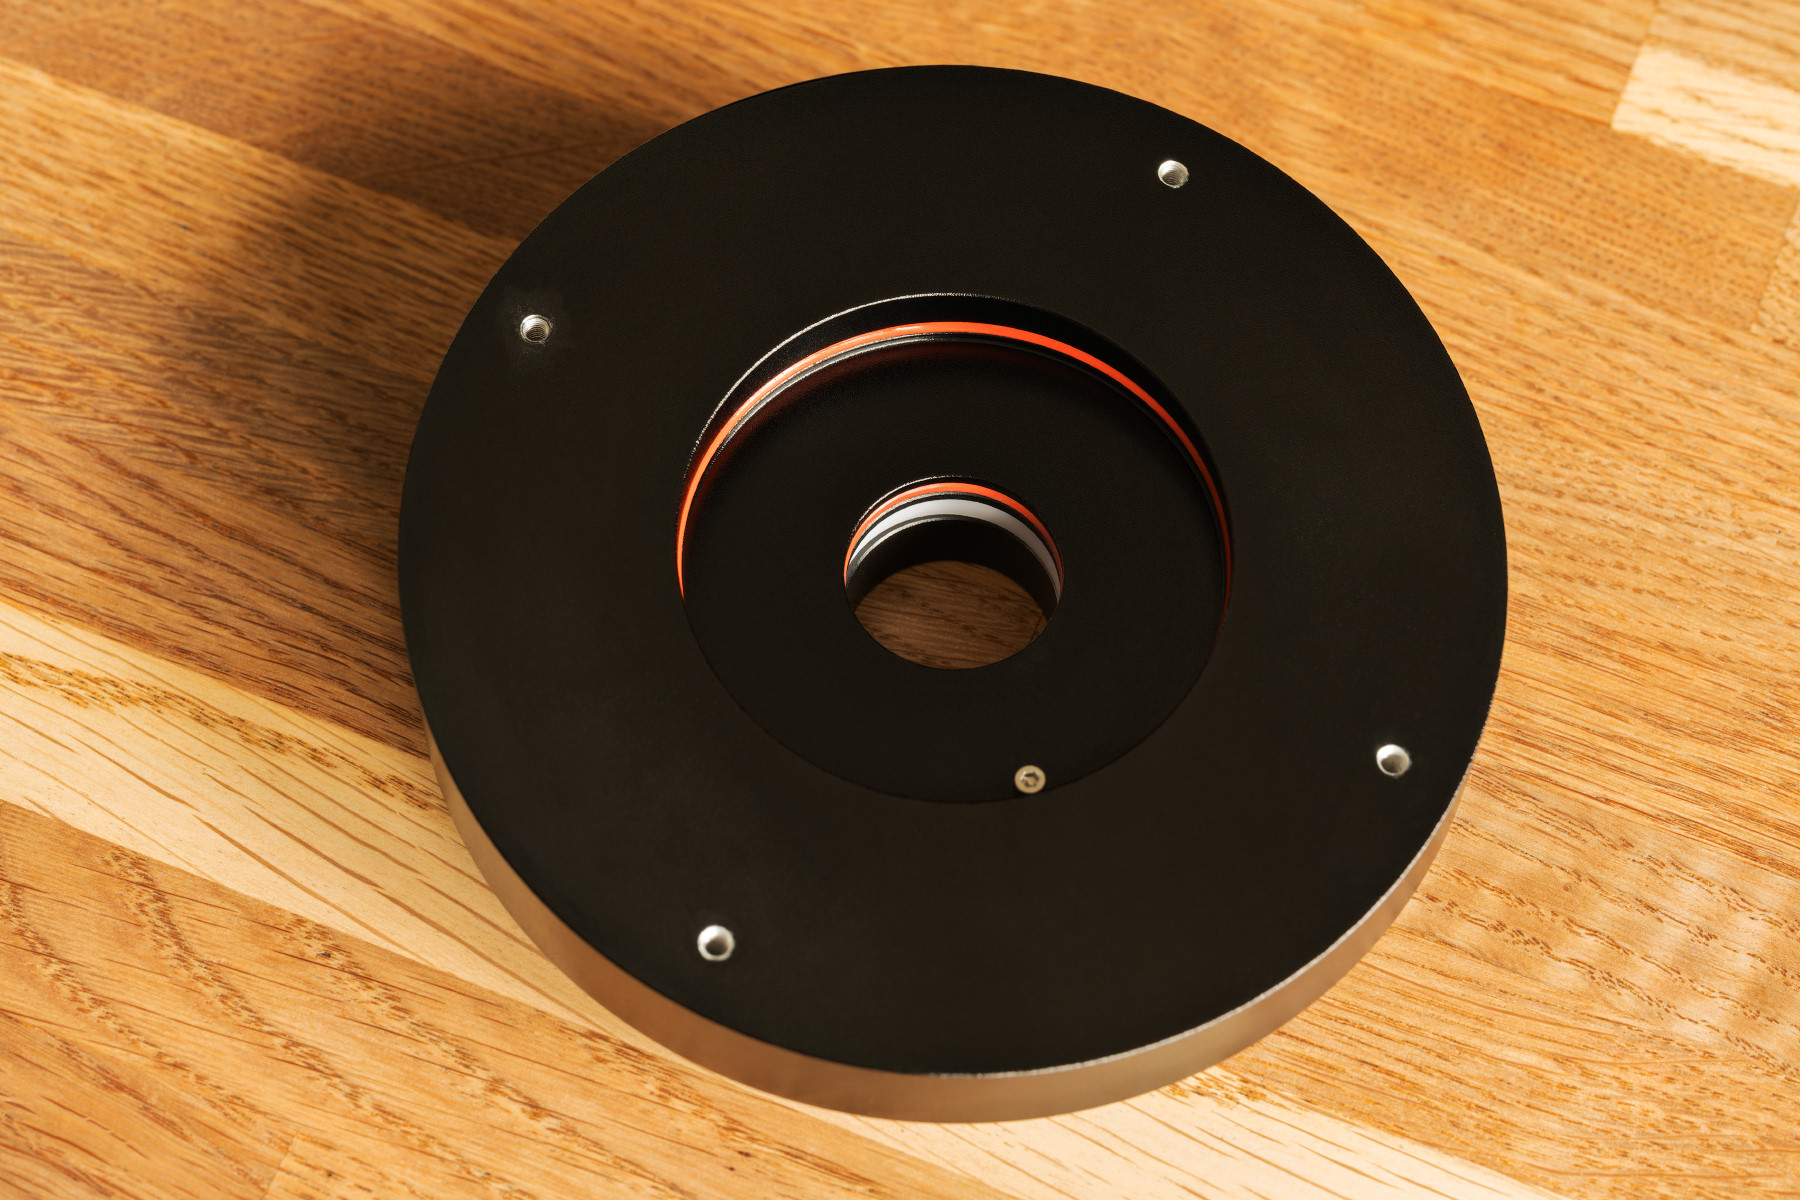
Let me note that the faceplates now have markings for the exact placement of headphones on the rig, as well as a noticeable bevel that repeats the geometry of an average human head.

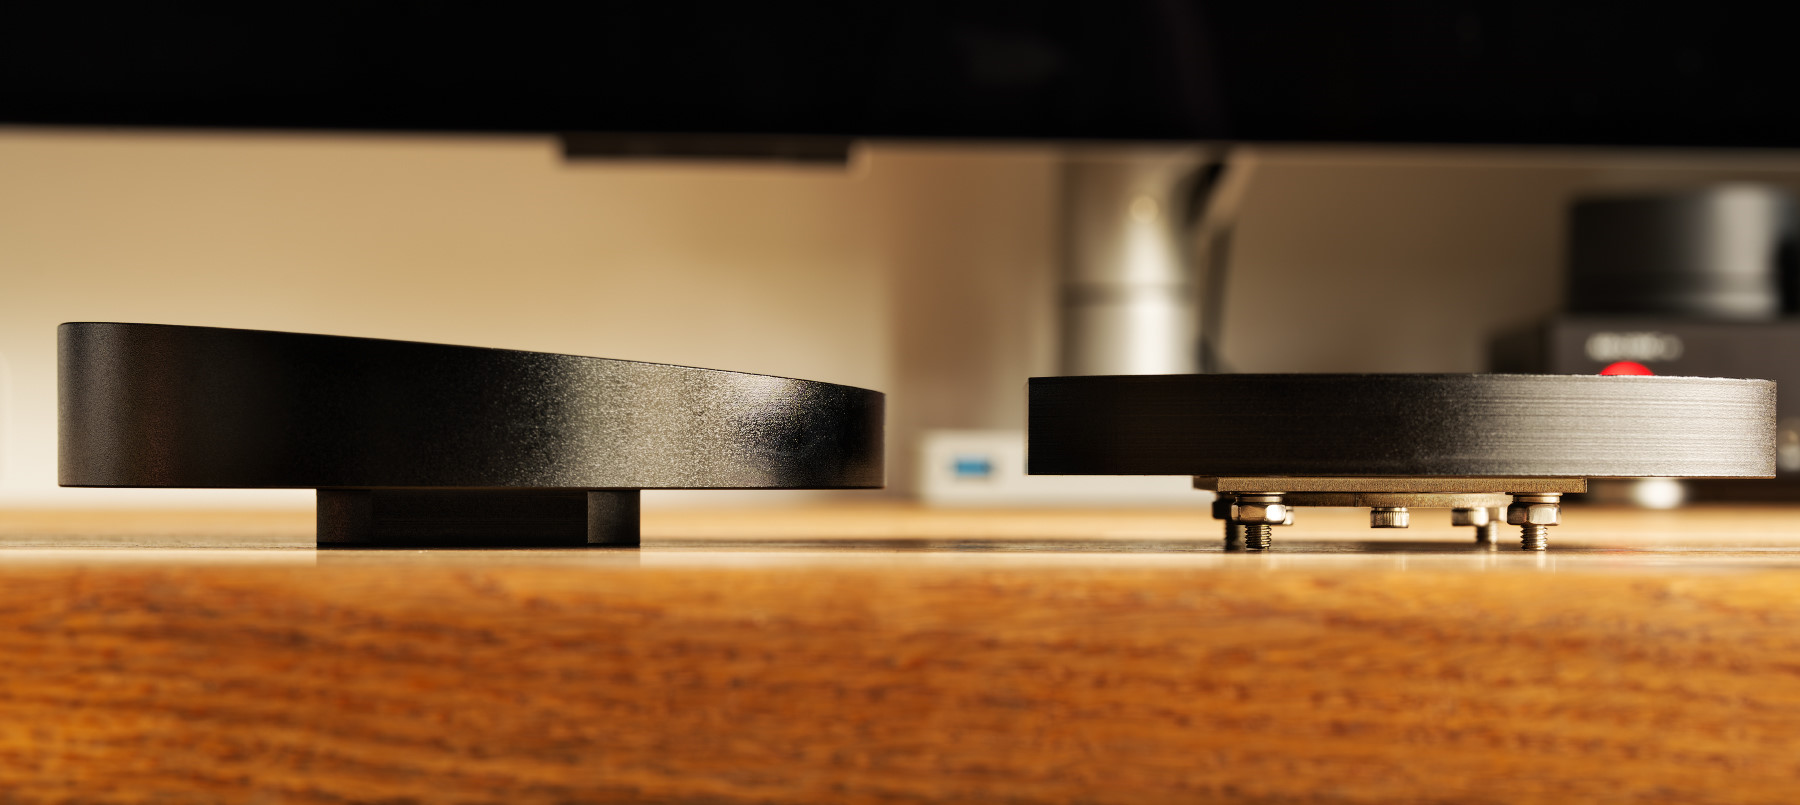
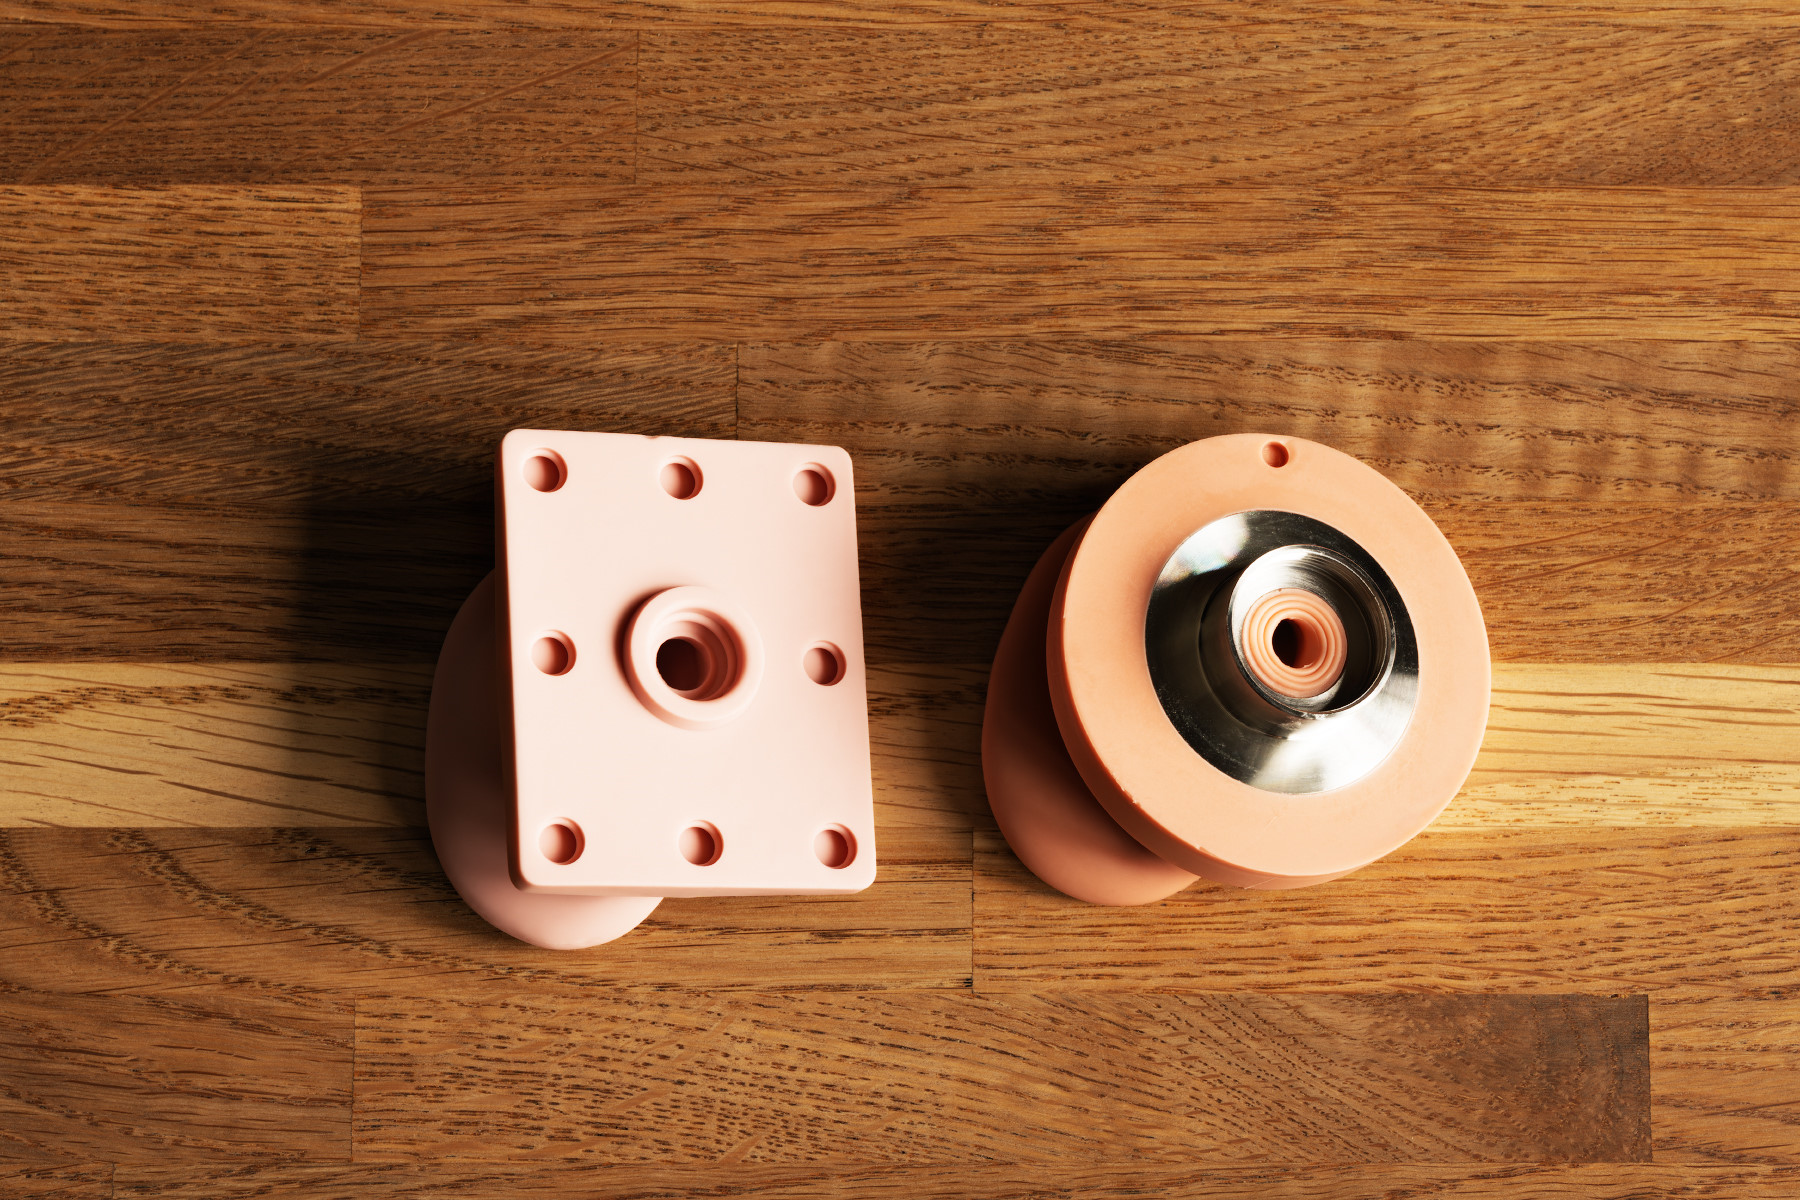
While the old ears could be positioned in slightly different ways by setting them with more or less pressure, the new ones always fall into place in exactly the same way. In other words, the measurement results are more consistent. There are now sealing rings inside the metal bases that prevent sound leakage.
The size of the bases has also increased, as well as their weight: the new ear with a metal base weighs 660 g (the old one – 430 g), and the assembled rig’s weight is 1.1 kg. It turned out to be quite a massive thing.
There are two disadvantages.
Firstly, while the ‘old’ ears could be quickly changed and I could do with just one base, this process will take an enormous deal of time with the new ones because unscrewing and tightening 4 screws and carefully inserting and removing the ear every single time is just all over my ass. So I had to buy two bases and two new ears.
Secondly, the silicone, from which the new ears are made, is weeping. Not much, not too fast, but it’s weeping because it’s constantly trapped between the metal base and the top plate. I would wholeheartedly recommend unscrewing the screws and wiping everything inside from time to time, say, once every six months.
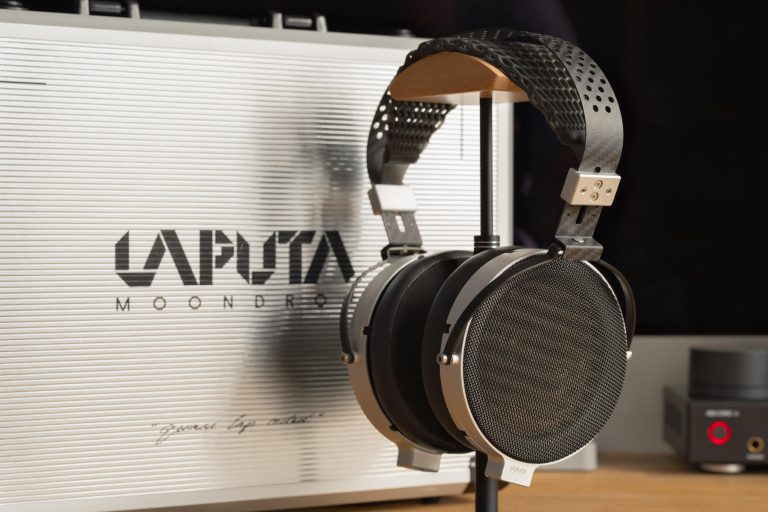
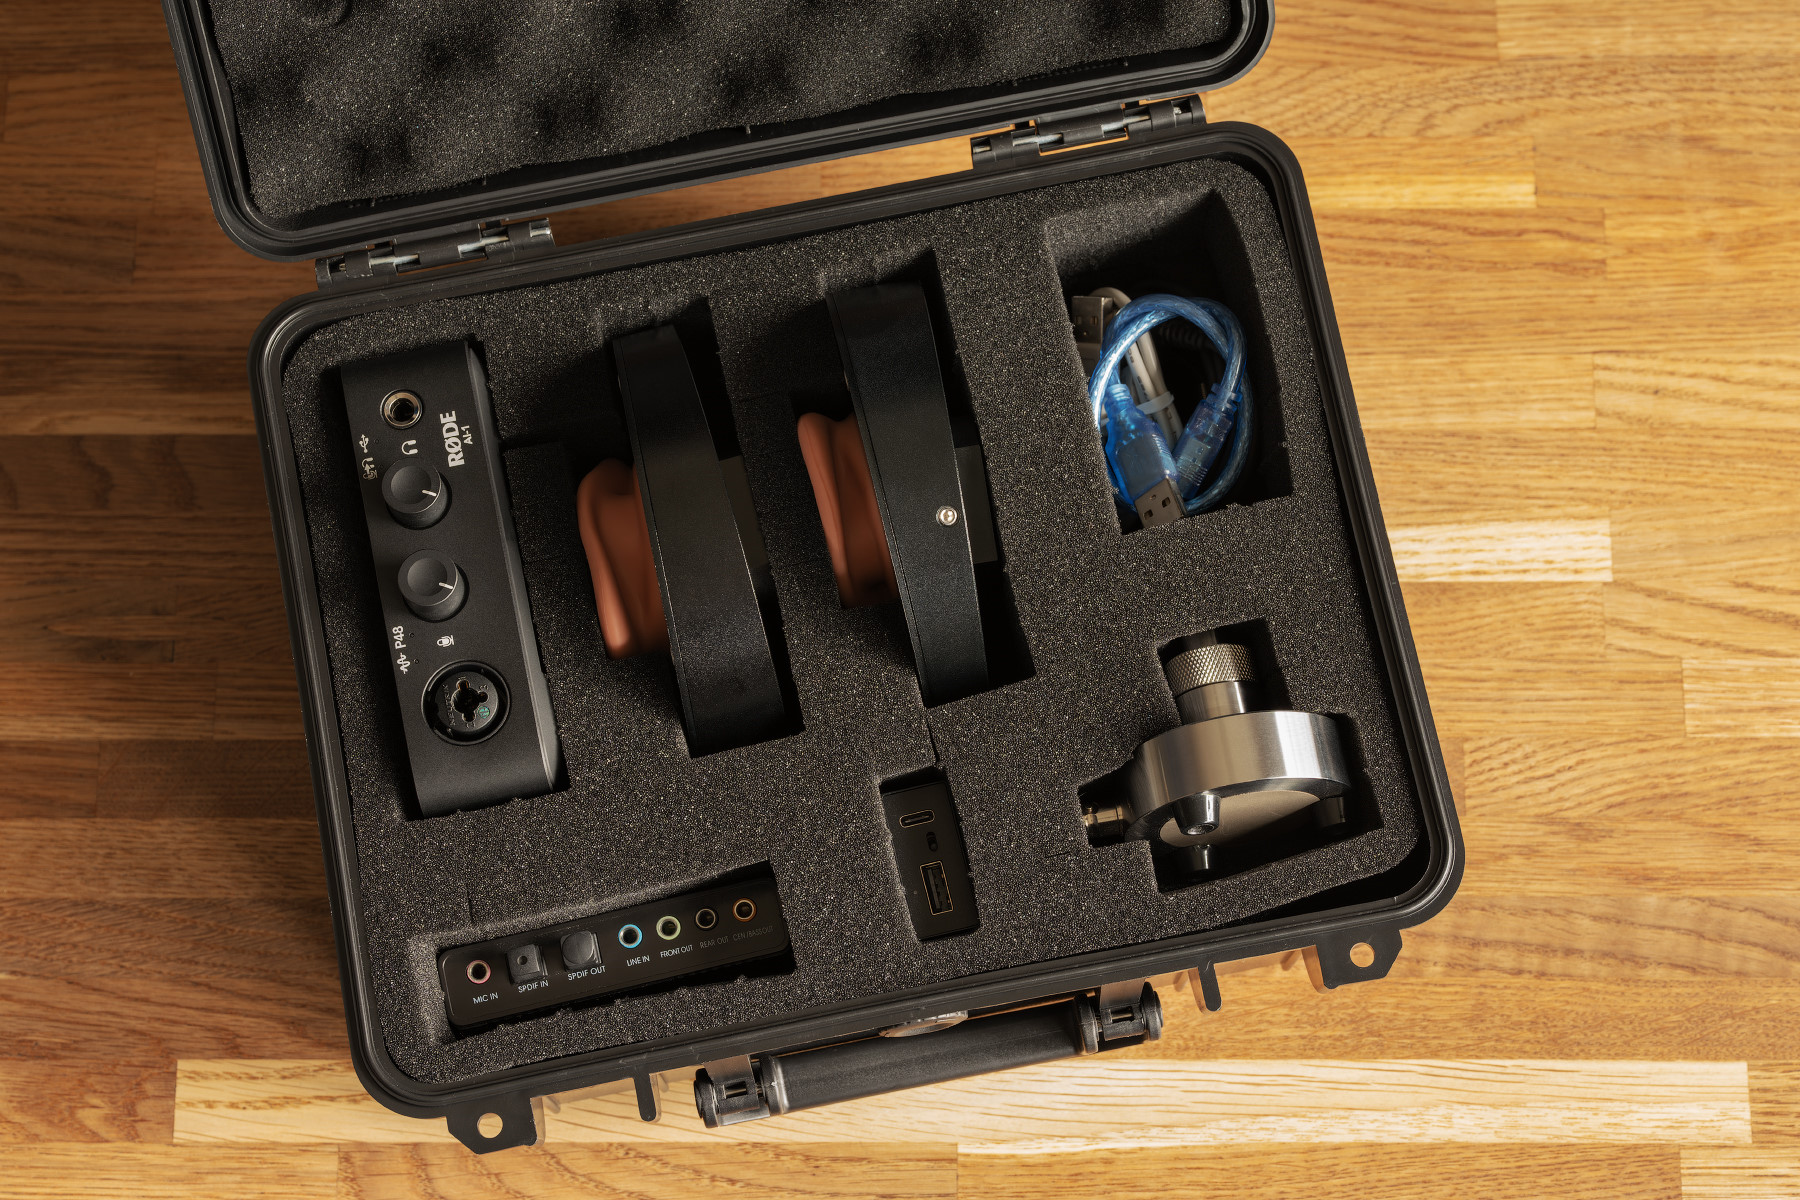
I keep this piece of equipment, as before, in a plastic case. My ‘onsite’ sound source never changed — it’s RODE AI1.
The key question is, how much better are the new ears than the old ones?
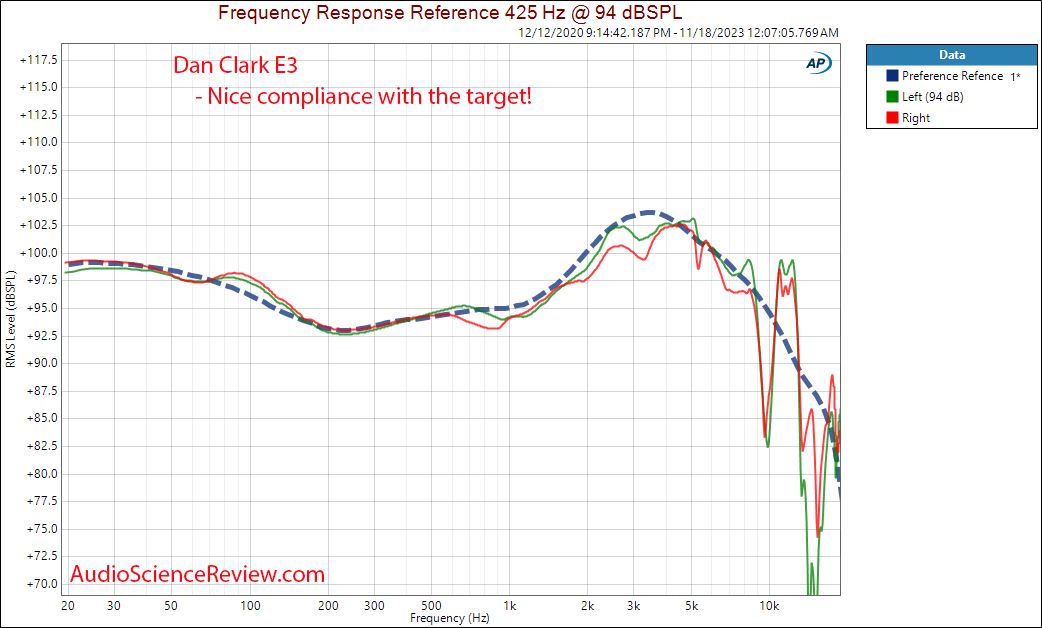
The relationship is non–linear, that’s why for some headphones the difference will be very significant, while for others it will be almost imperceptible. Dan Clark Audio E3 (left earpiece, 3-dimensional averaging with minimal position change):
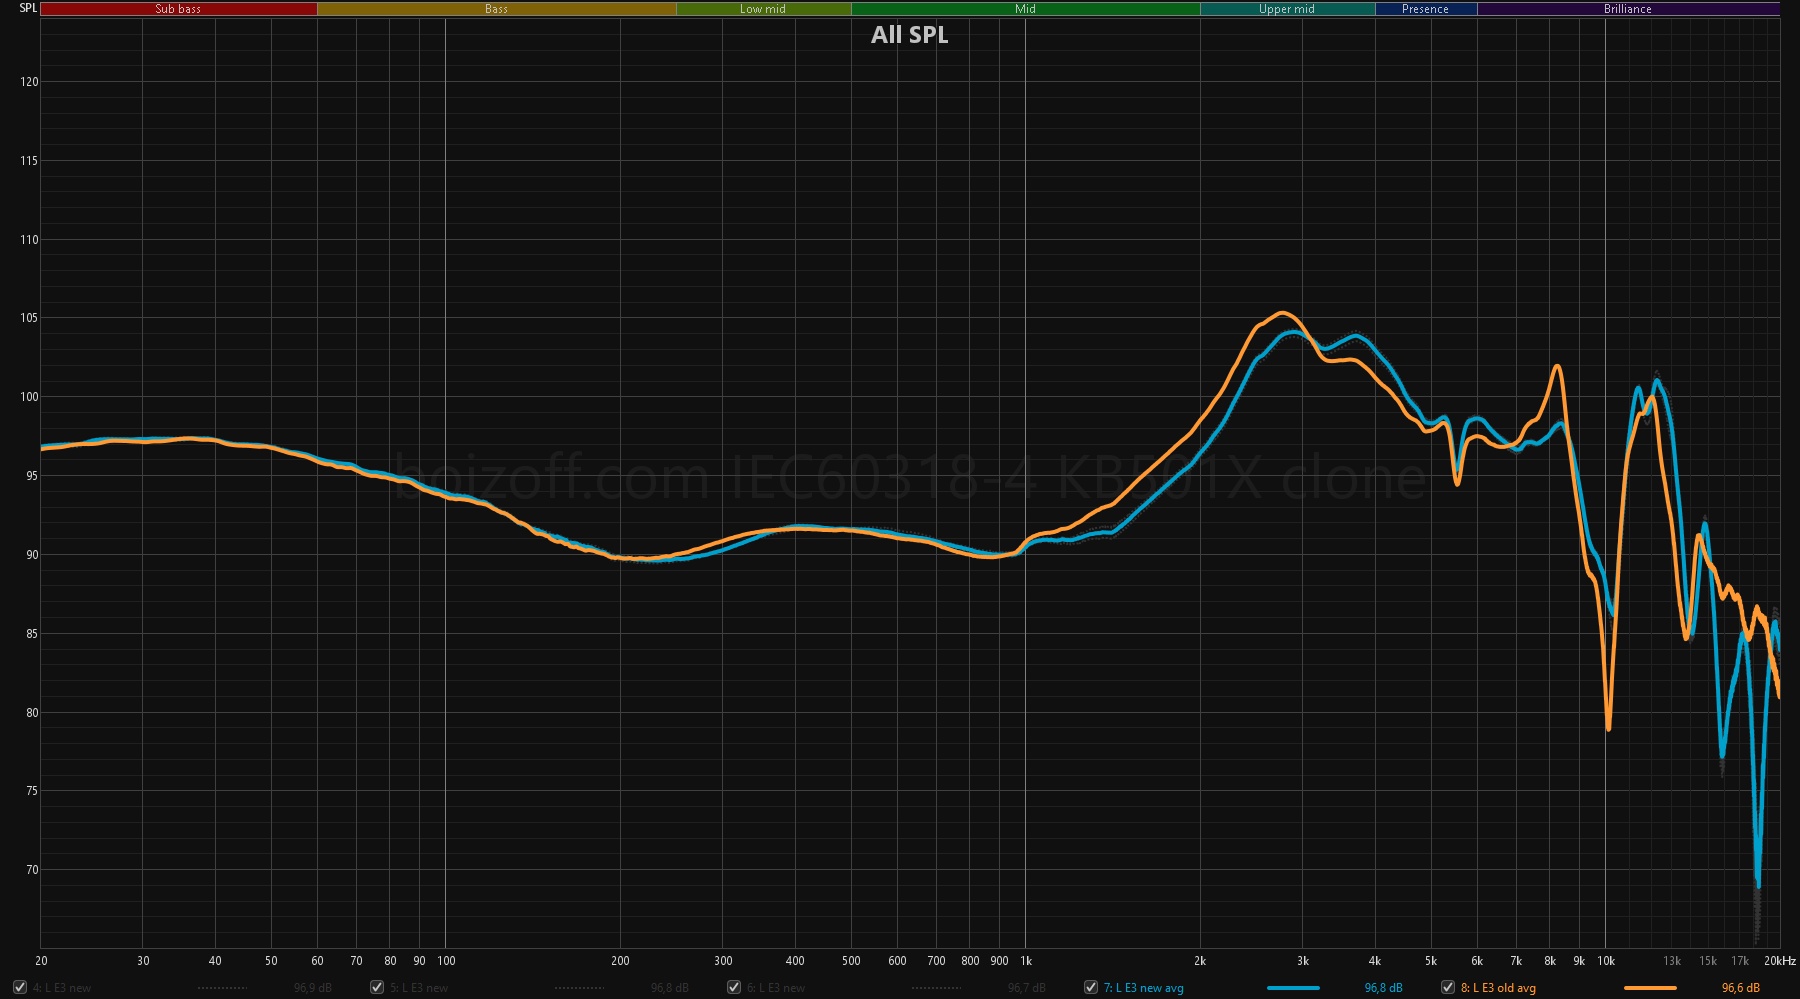
В случае DCA E3 cтало значительно лучше уже после 1 кГц, исчез пик на 8,2 кГц, а вот пик на 11-13 кГц приобрел правильную форму.
Можно сравнить, хотя бы и визуально, с измерениями Амира:
In the nearest future, I’ll try to get something well-known, such as Sundara or HD600, and show the difference and proximity to the reference measurements more clearly.
It goes without saying that the main limitation of the very 60318 standard at 10 kHz from above is still there. Let’s wait until the Chinese copy B&K 5128.
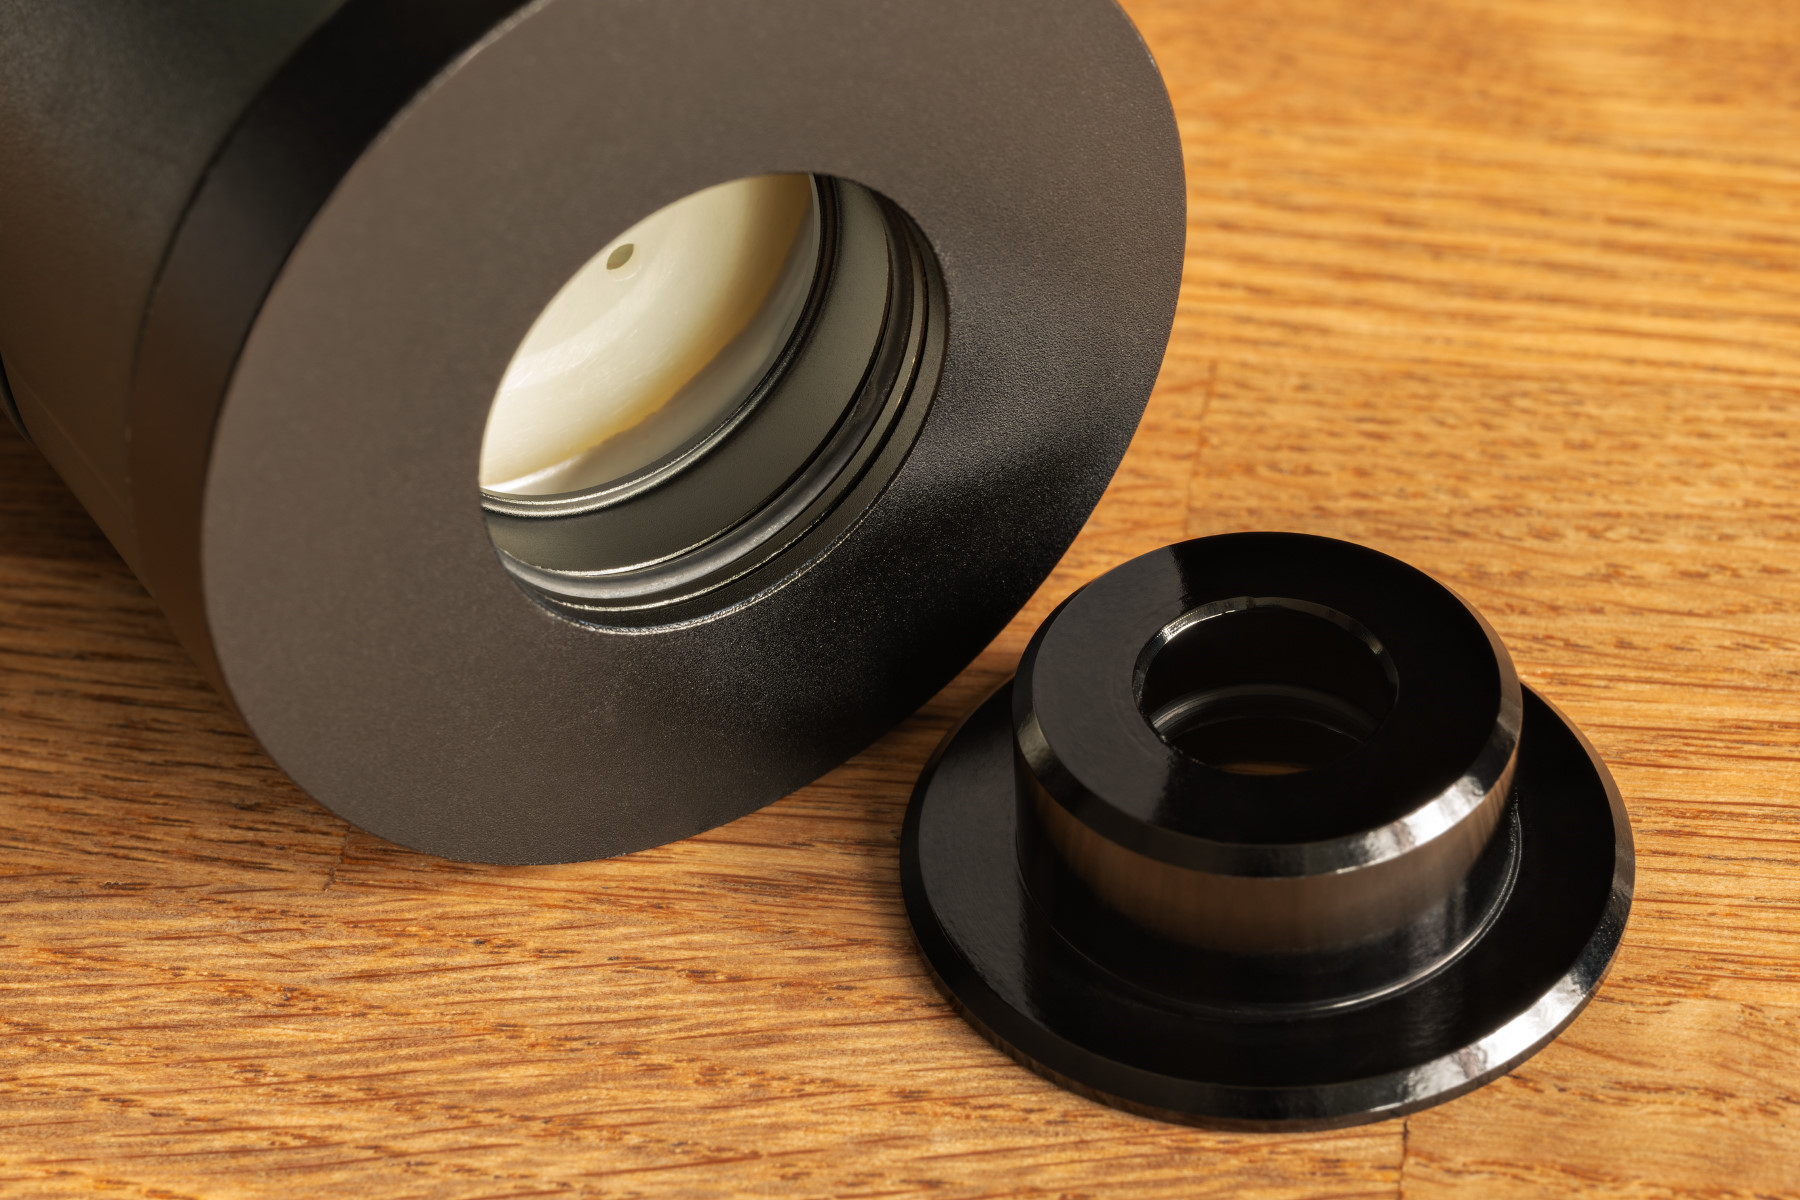
Lastly about the rig, some users had problems with its correct assembly so that nothing would get loose or crawl around. This is how it is done:
1. Unscrew 4 screws on the face plate.
2. Insert the rubber ear with reference to the marking: the cap of the small screw on the inside of the metal base should fall into the recess on the back of the ear (see the pictures above).
3. Screw back the face plate.
4. Loosen the small screw on the side using the hex wrench provided.

5. Screw the ear to the ear canal simulator.
6. Tighten the side screw, but not too much, just a little bit.
Voila! The rig is assembled.
2. Acoustic calibrator
In order to properly measure the distortion of headphones at a certain volume, first of all, you need to somehow set this very volume reliably. In other words, you need a certain sound source that produces a sound of a fixed volume at a certain frequency.
This thing is called an acoustic calibrator. The parameters that such devices must meet are specified in the IEC 60942 standard (last updated in 2017). Its Russian equivalent is GOST R IEC 60942. This is how my device looks like:
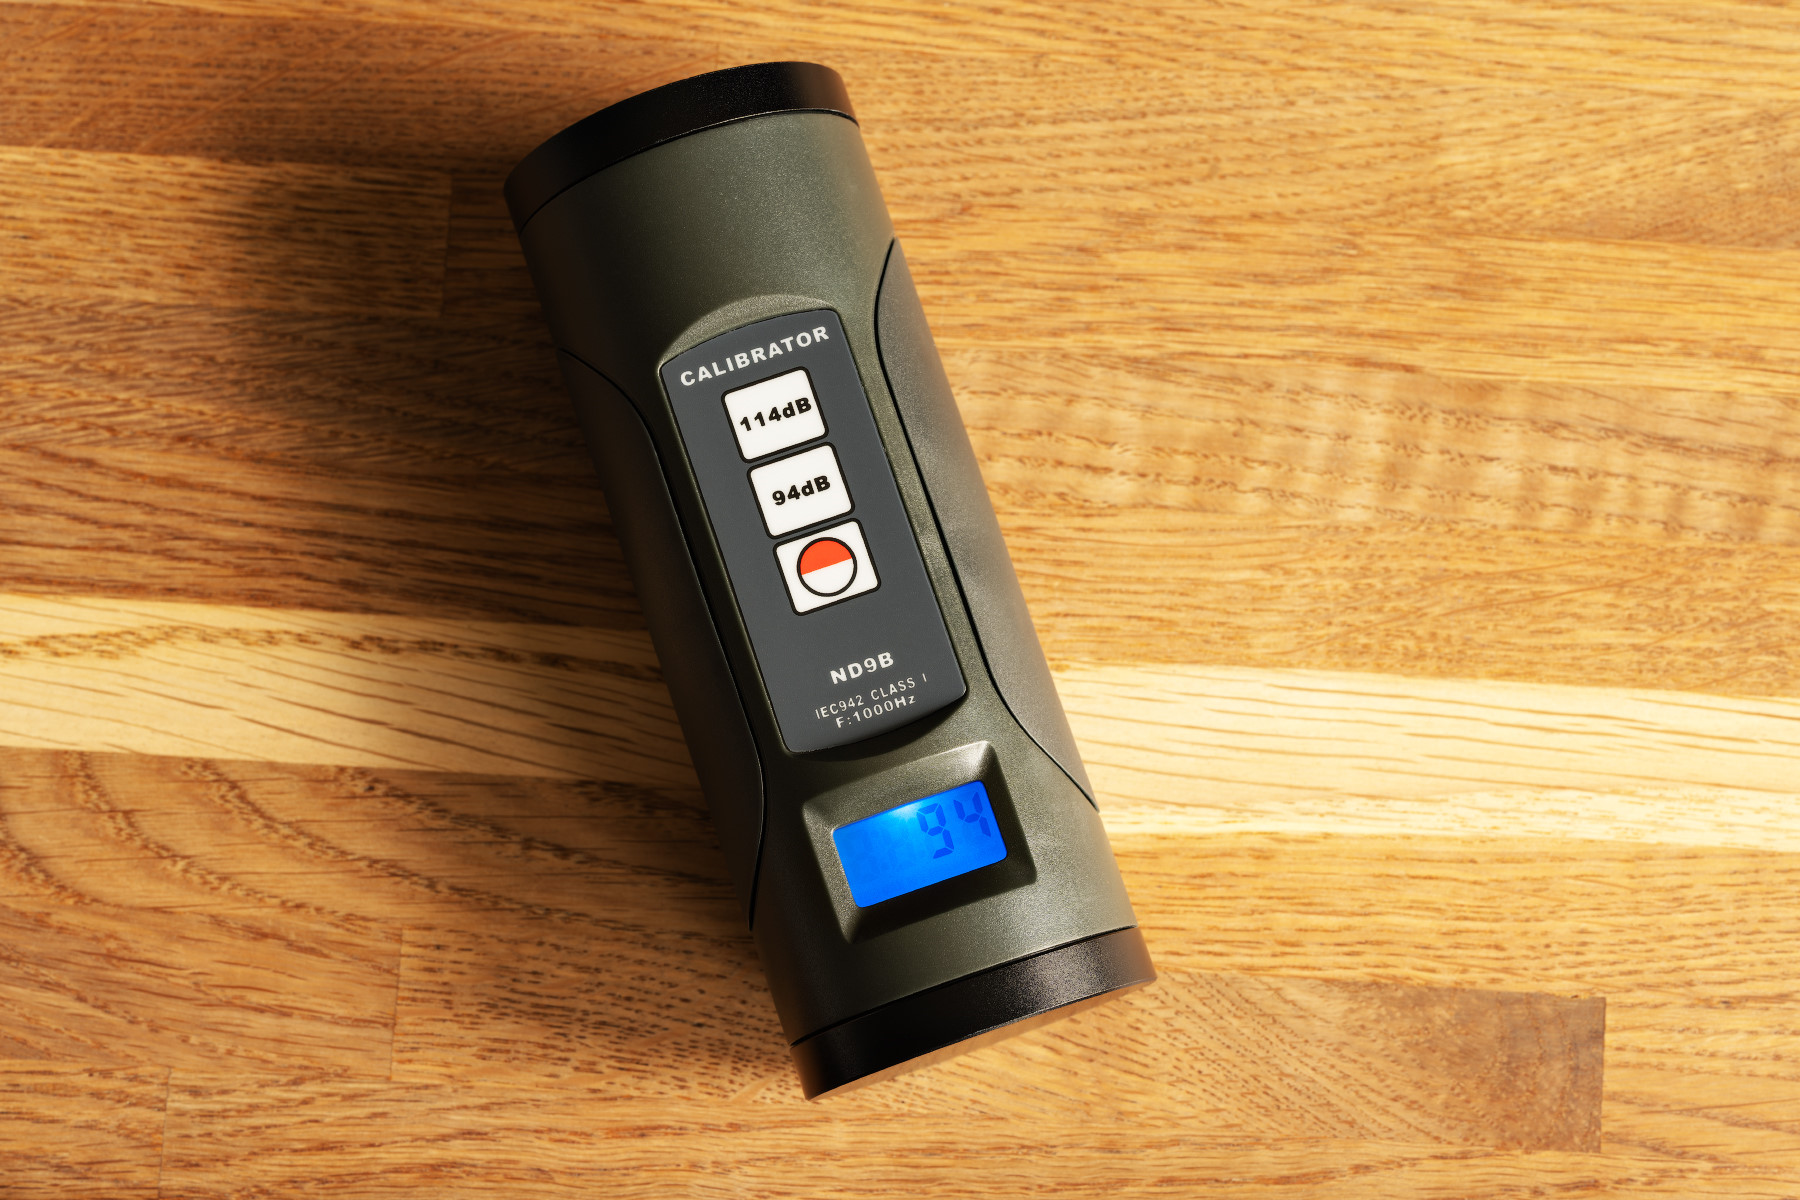
So, it’s sort of a ‘can’ that can do only one thing – produce 94 or 114 dB of sound at a frequency of 1000 Hz. I use it to calibrate the rig microphone every time. There is a hole in the bottom of the calibrator, into which a 1″–½” adapter is inserted.
The calibrator ‘fits’ on the rig perfectly.
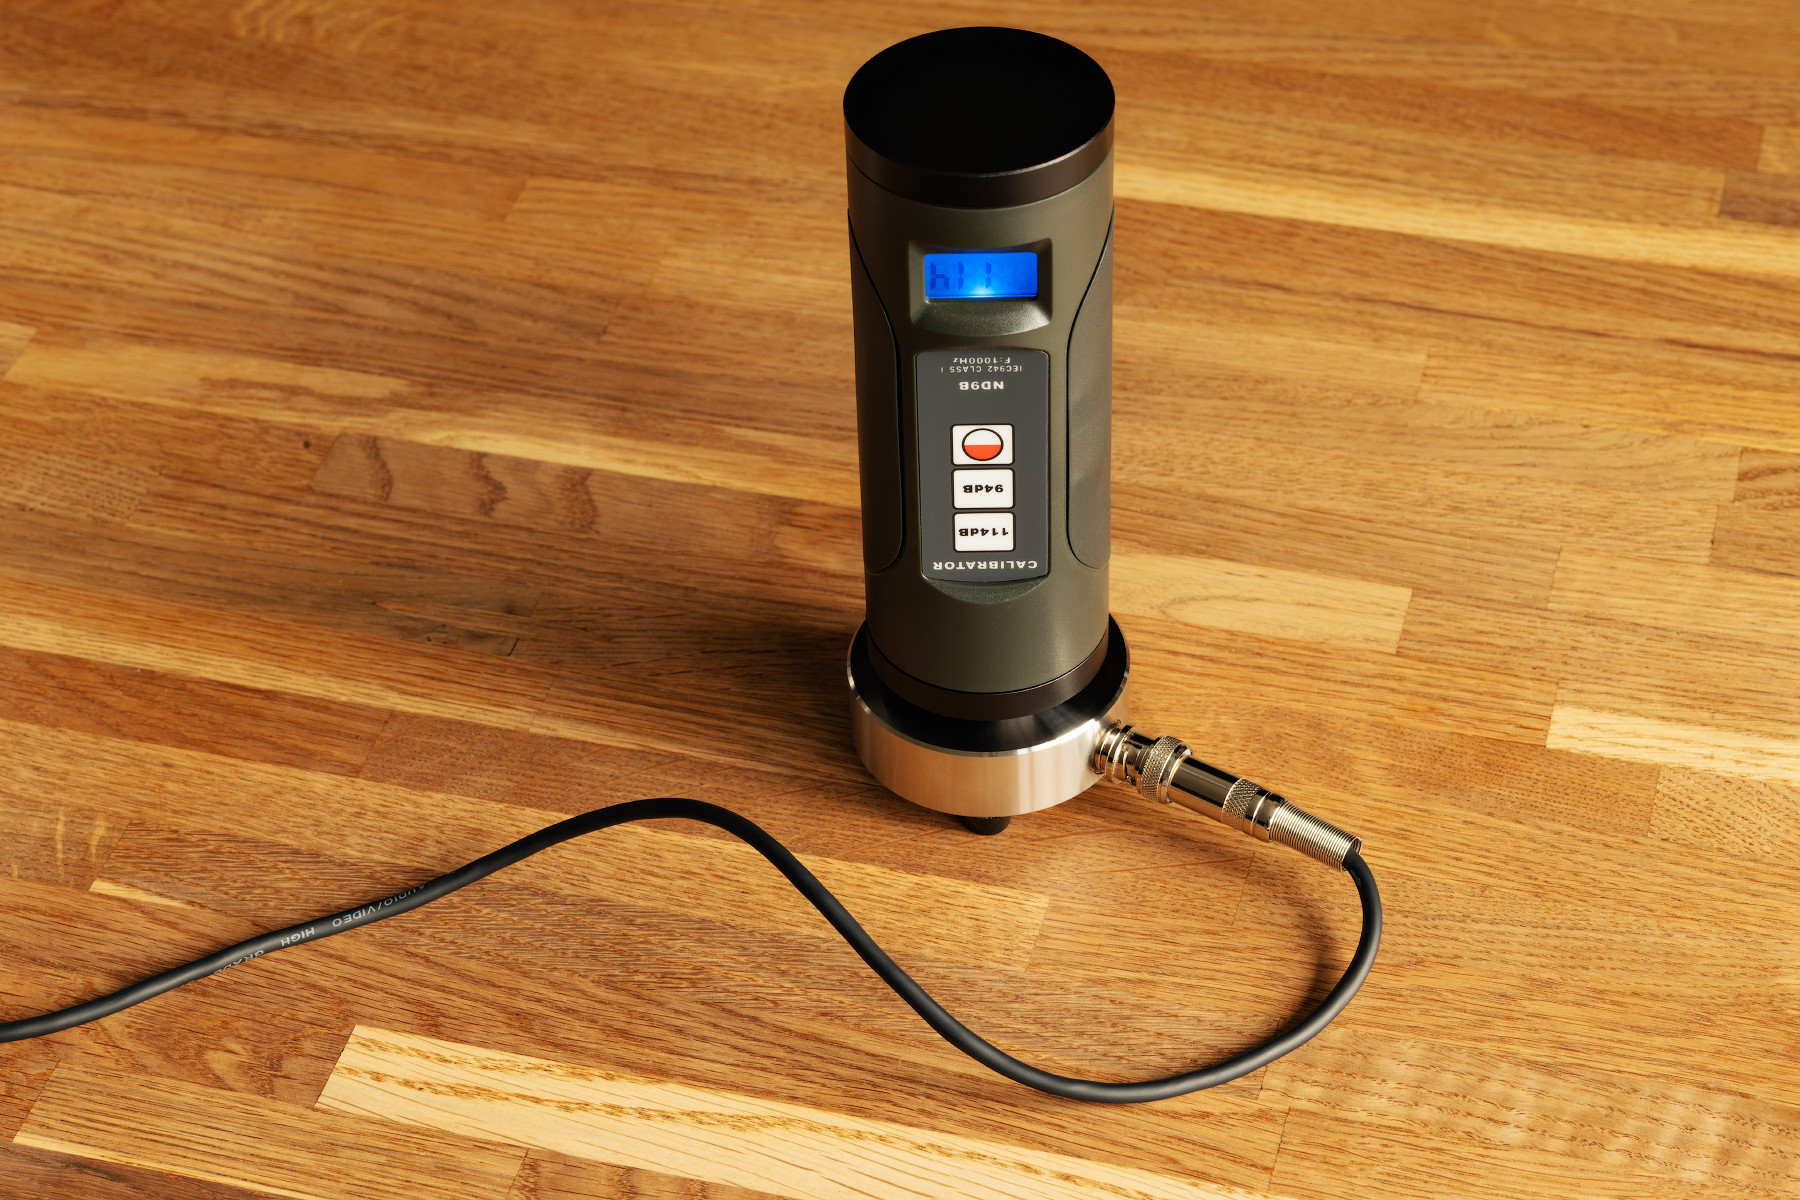
There are sealing rubbers inside the calibrator, so there is no sound leakage. Keep in mind that there are more advanced models that support not only 94 and 114, but also 104 dB of sound pressure.
3. Power insulators
A power insulator is a device that allows for isolation of the USB line from interference and for reduction of background noise, as well as removal of ground loops. This is a really necessary thing to measure the distortion of DACs, as well as headphones. Technically, it is a galvanic isolation (at least it seems so – I’m not an expert in this regard), but it also allows for separation of the power and data lines, that is, connection of a separate power source, even if the DAC is powered by USB.
I use two devices of such kind – Topping HS01 and Topping HS02:
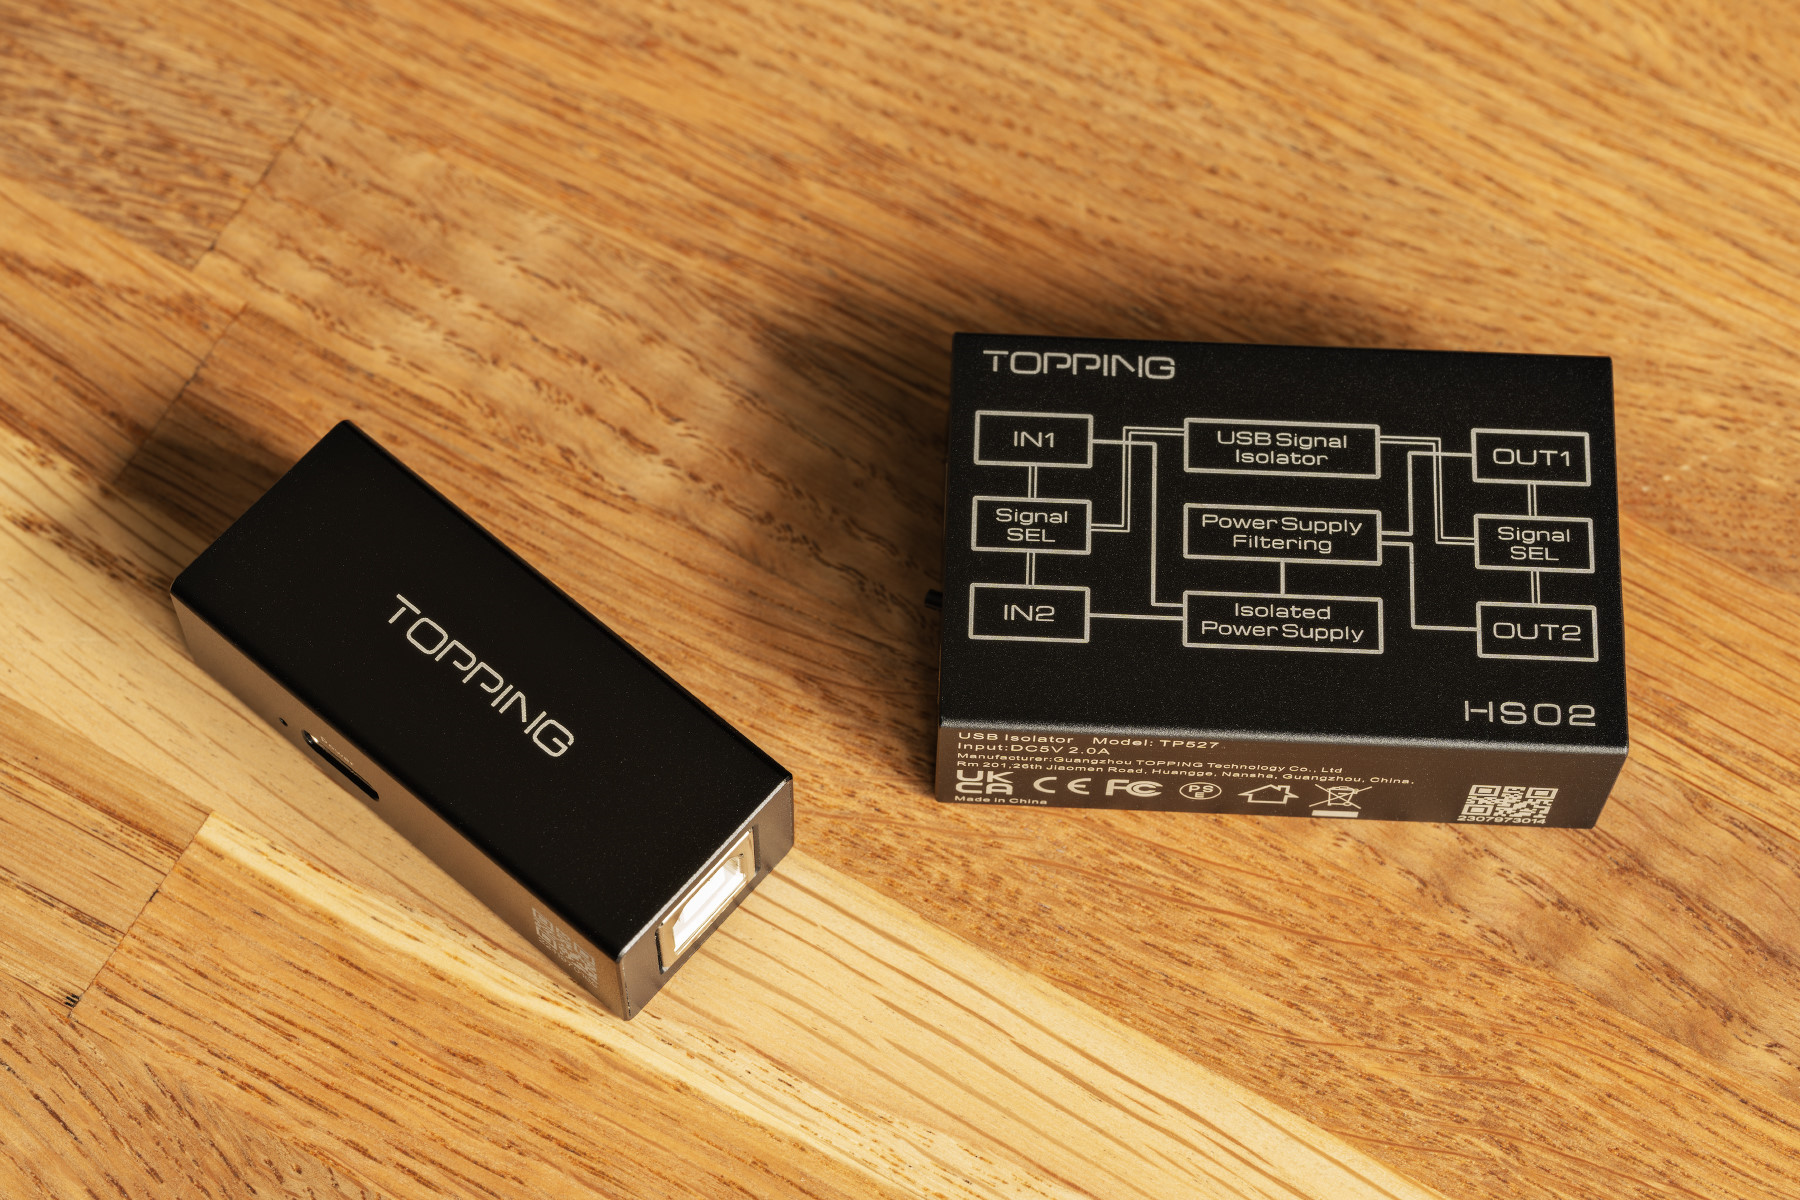
One is for connecting the source, and the other is for the rig (microphone).
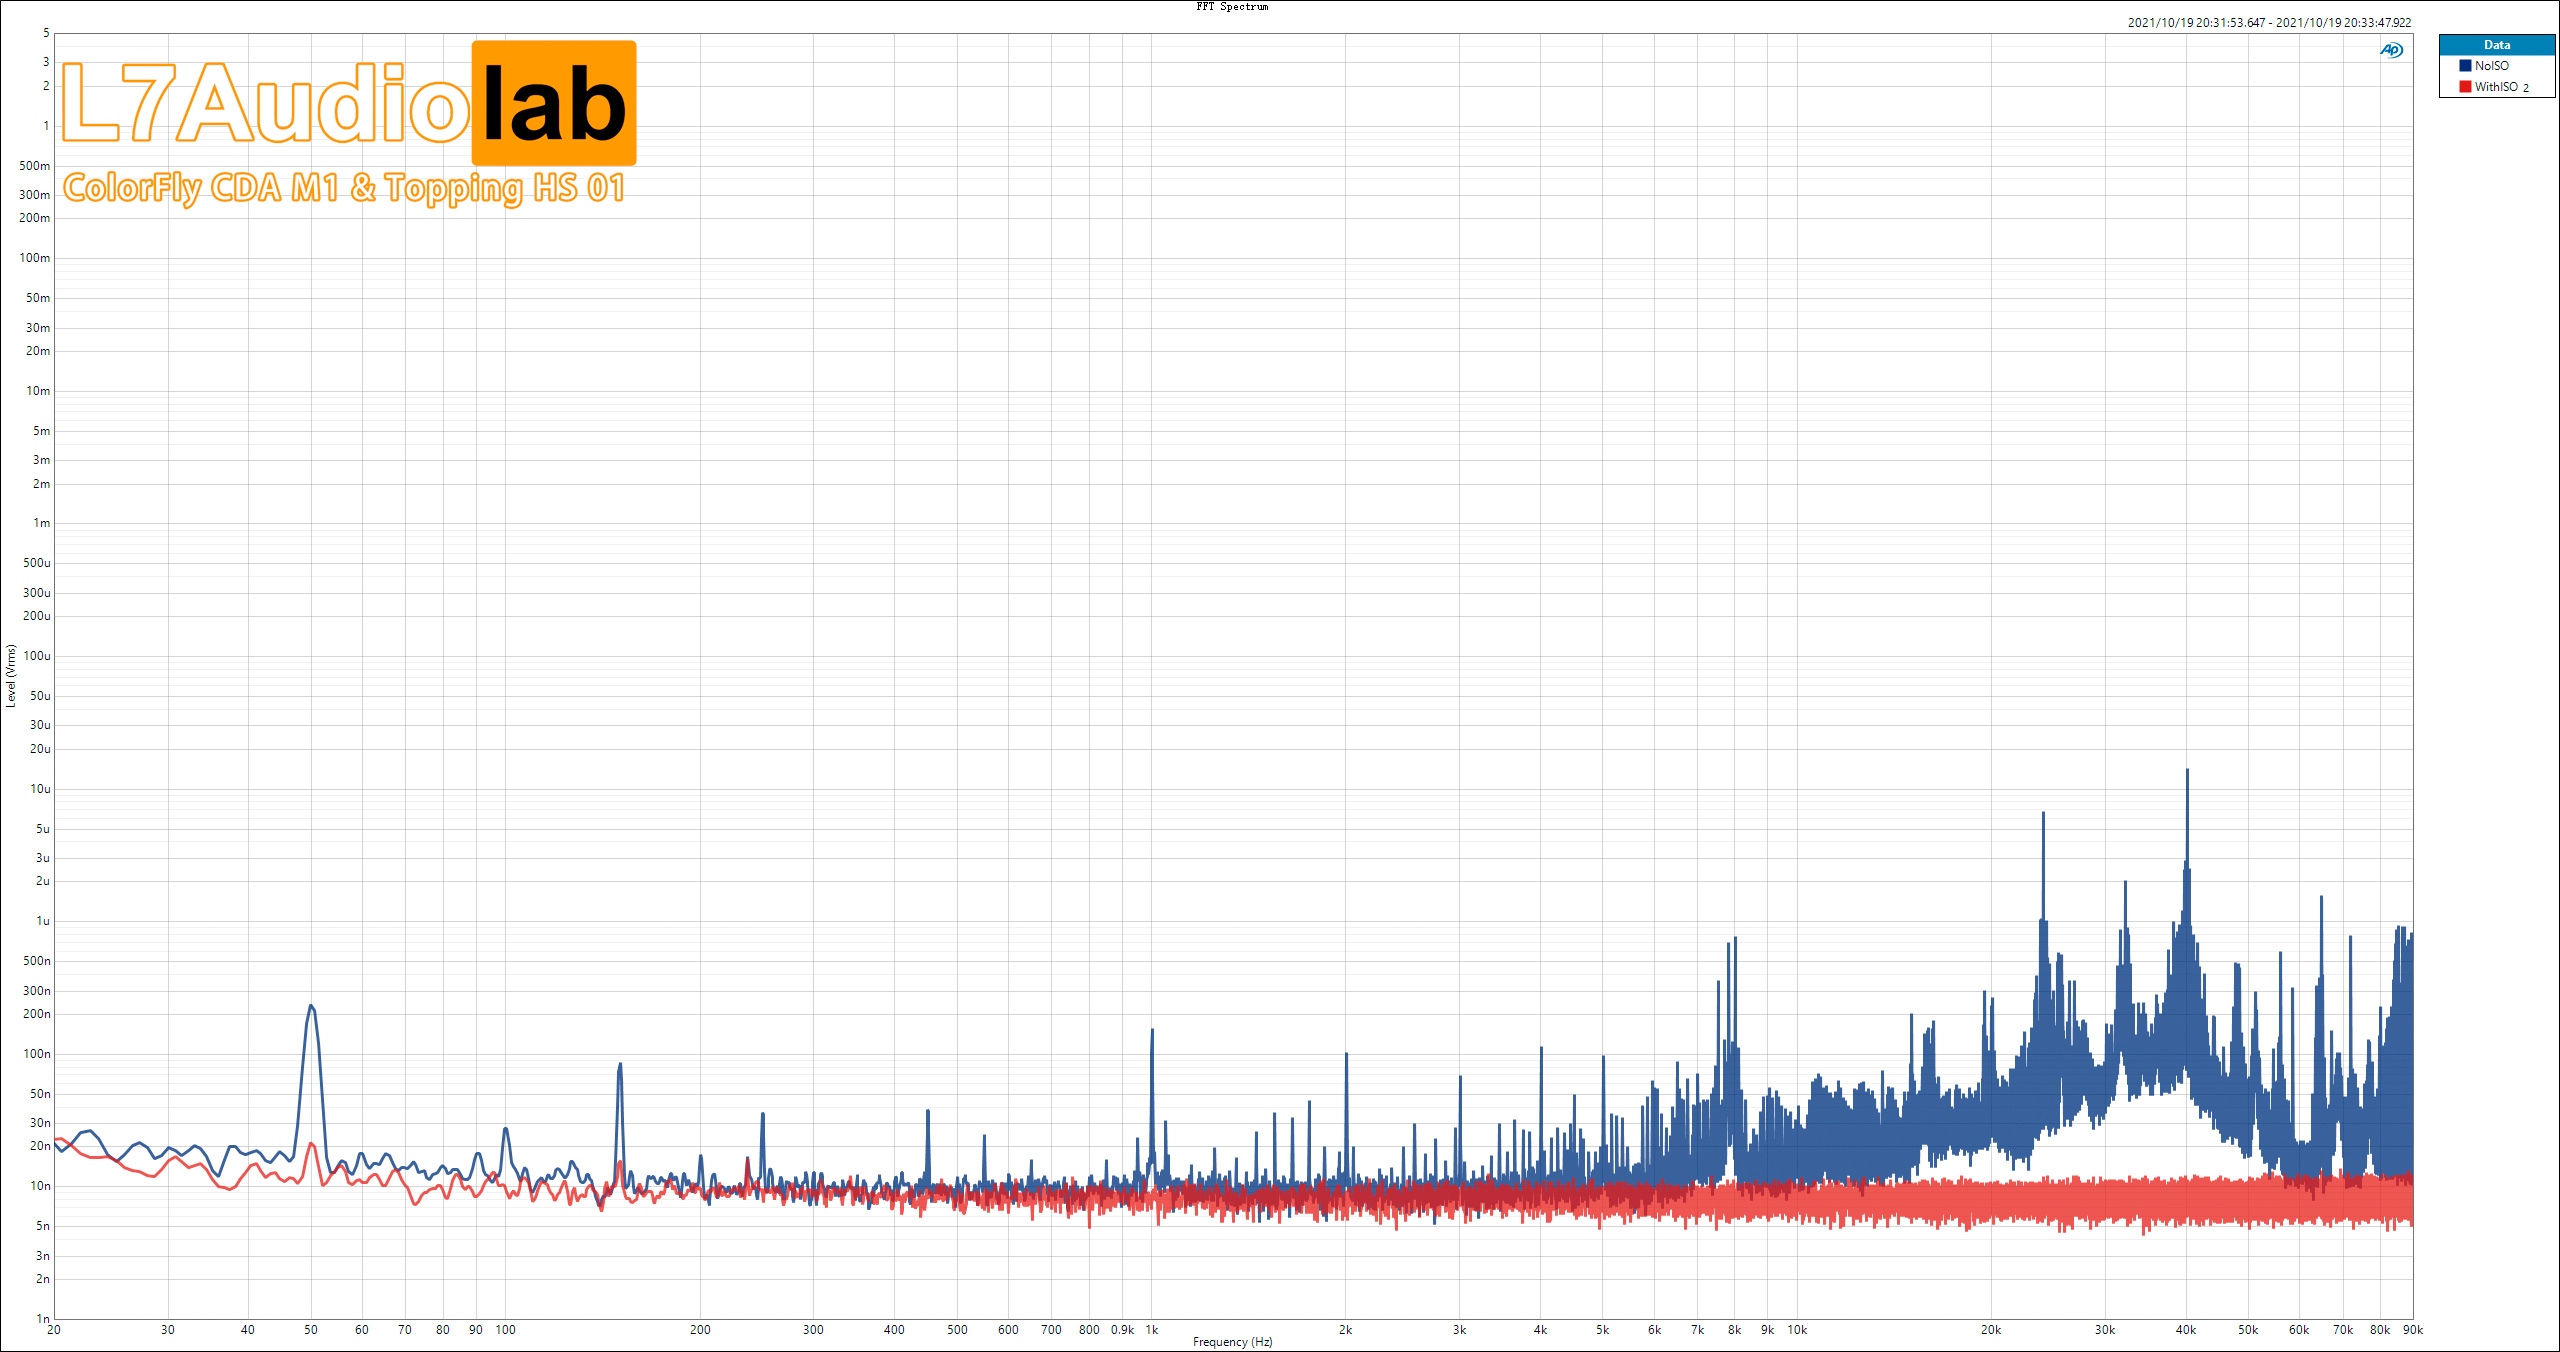
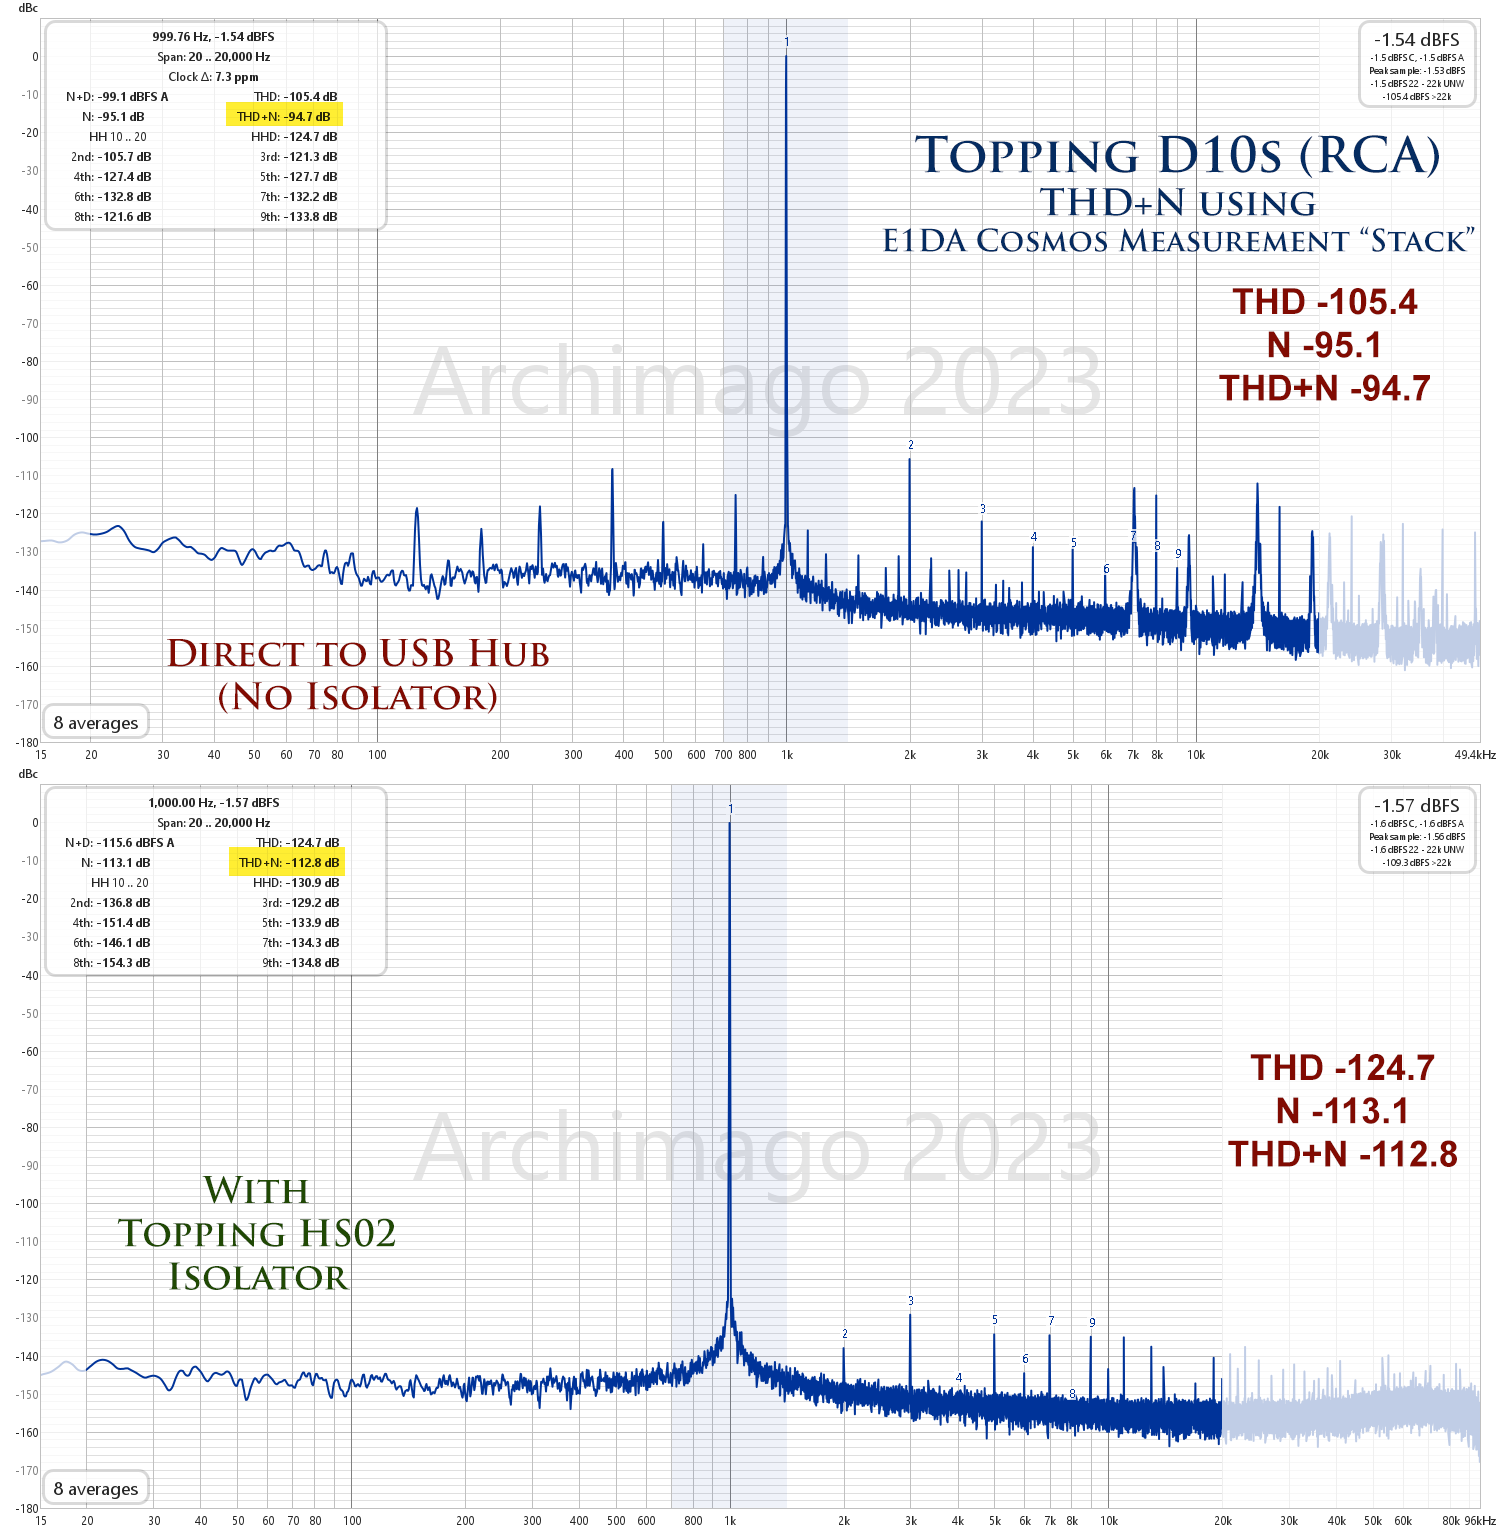
Do these devices work? Yes, they do. It’s been tested and measured a long time ago:
4. Sound source switcher
I’ve said it time and again that comparing the sound of sound sources with the same headphones should only be done using a hardware switch. One sound source is playing, you press the button and immediately hear the other source. Obviously, the sources must be pre-aligned in volume.
It seems to me that I’ve tried all the available models. Below in the picture are only those that work more or less:
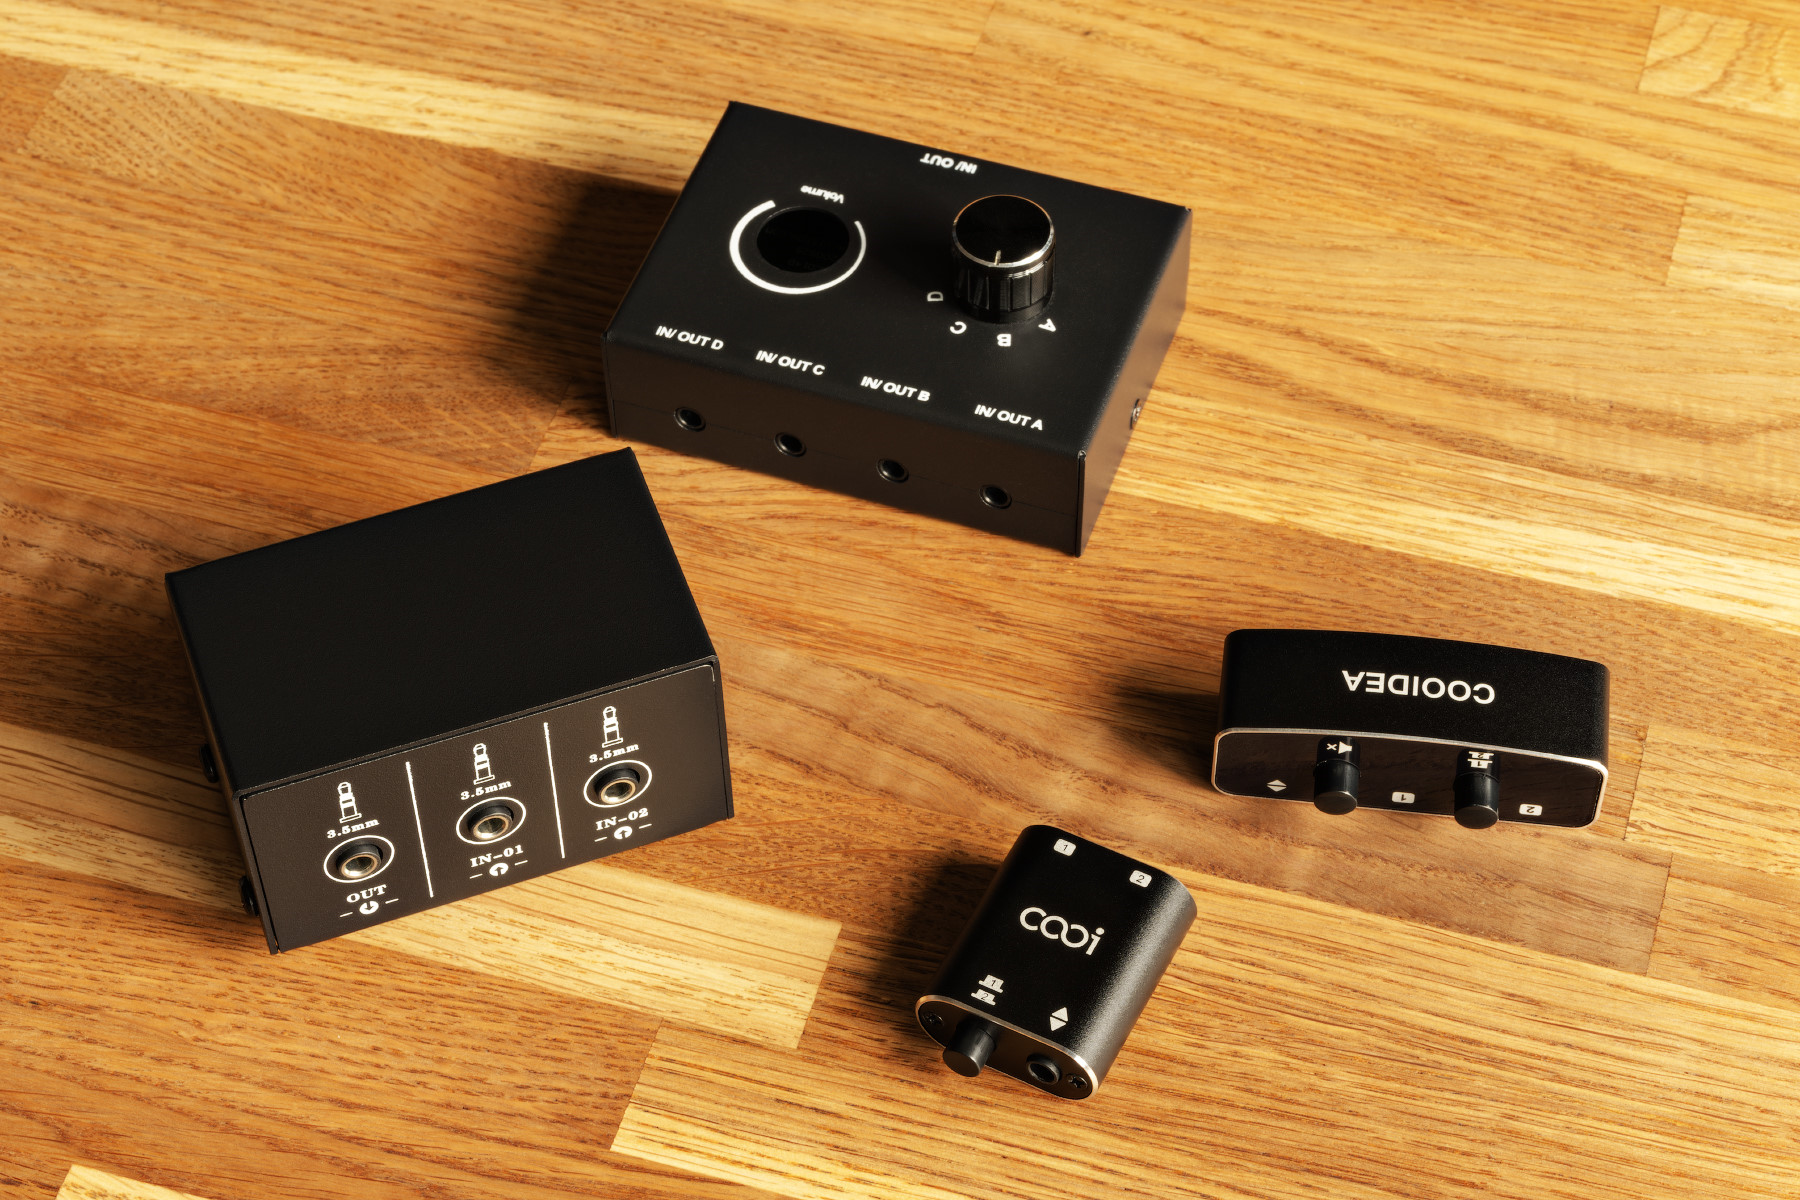
The most sensible option turned out to be a box with a hole at the top of the picture – there was a volume control there. And I also had to solder the built-in capacitor out of it.
The problem with all such devices is an unstable contact, that is, a poorly made button / knob. The thing above is the best one I could find, although it can happen, too, that after the inputs are switched, noise suddenly appears in one of the channels.
I talked to several craftsmen and asked them to make a custom device like this one for me, but they all refused. If you know where to get this device of high quality and with positive action, please do not hesitate to write me.
5. How much is the fish
Prices are constantly changing, but it turns out like this:
- The rig (excluding the sound source) is about $750.
- The acoustic calibrator is about $100.
- Power insulators are about $200.
- Switches, additional wires, and other nothings such as a digital caliper and a storage box are some more $100.
The total amount is about $1,150.
However, it’s not so difficult to earn this money and buy the above-mentioned devices as to learn how to use them correctly.
6. Improvement and development plans
Number one I’m thinking about right now is creating an acoustically and vibration–insulated camera in which it will be possible to measure distortion very, very accurately. I’m kind of jury-rigging this issue now, though I want to do it in a big way. At the moment, it’s all about trivial shortage of time, as well as space: the walls of the camera, according to my estimates, should be about 8 cm thick, plus the space inside should be sufficient for comfortable placement of any over-ear headphones. It turns out to be a fairly large rectangular block, which, for convenience, should be equipped with either wheels or something else for free movement around the apartment. Anyway, I’m figuring it out.
Number two is to change the power supply for the rig microphone. I got an opportunity to purchase a linear power supply, B&K 1704-C-102, which is also sometimes called a ‘power conditioner’. If I buy it, I’ll have to change the microphone. And it’s not clear how much the measurements will improve.
Number three is to provide the ability to measure the frequency response of headphones with different intrinsic resistance (source/cable). A cable with tuning resistors from 0 to 100 Ohms is already on its way to me.
Basically, this is it. It looks that further investments of money and time in the measuring rig do not make sense because the quality of the results will not improve any more.
That’s about it!